
Dawn of photography
More than 200 years ago, the first discoveries were made of light-sensitive chemicals and mixes. Those were the days of dawn of photography. Many different processes were discovered and some of them have made it into commercial photography. One of the most important ones was the process of blue printing, also called cyanotype. We still know the word blue print, and it stems from one of the old - and now almost forgotten - processes. In this experiment, the basic principle behind this process is demonstrated. True cyanotypes use more advanced mixes of chemicals to increase sensitivity and contrast, but this experiment nicely shows the basics of this process.
A mix of two chemicals is made, which is painted on paper and allowed to dry in the dark. The dry chemical mix is light-sensitive, a redox reaction occurs, which only occurs when light hits the mix of chemicals. In this redox reaction a blue compound is formed.
![]()
![]() Required
chemicals:
Required
chemicals:
-
potassium hexacyanoferrate(III), a.k.a. potassium ferricyanide.
-
ferric ammonium oxalate, which better can be called ammonium tris-oxalatoferrate(III).
-
dilute acetic acid, plain white household vinegar is perfectly suitable
![]() Required
equipment:
Required
equipment:
- test tubes
- sheet of white paper
- glass place and some heavy objects to keep the glass plate in place
- brush or little glass rod
![]() Safety:
Safety:
- Despite the word "cyanide" in the name of one of the used chemicals it is not really toxic. The cyanide is firmly attached to the iron atom and cannot easily be released.
- This experiment is not dangerous, but one must minimize exposure to the oxalate. Oxalate is moderately toxic. This experiment also can be done with ferric ammonium citrate (either green or brown) instead of ferric ammonium oxalate and then this even is suitable for somewhat older children with supervision.
![]() Disposal:
Disposal:
- Only small amounts of chemicals are used and none are really toxic. The waste can be flushed down the drain.
![]()
Preparation of photo-sensitive mix
![]() Take a small amount of potassium ferricyanide and a small
amount of ferric ammonium oxalate. Put the chemicals in separate test tubes.
Take a small amount of potassium ferricyanide and a small
amount of ferric ammonium oxalate. Put the chemicals in separate test tubes.
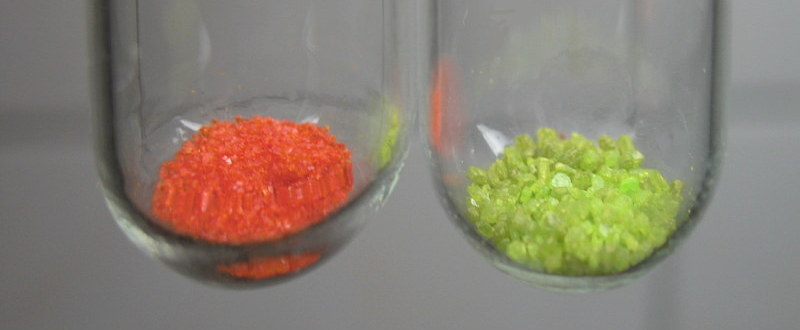
The picture shows solid potassium ferricyanide and solid ferric ammonium oxalate. Both chemicals are coordination complexes of iron(III). Their chemical formulas are:
- potassium ferricyanide: K3[Fe(CN)6]
- ferric ammonium oxalate: (NH4)3[Fe(C2O4)3]
![]() Dissolve
both chemicals in a small amount of water. Both chemicals dissolve in water
quite well. Potassium ferricyanide forms deep yellow solutions, despite the red
color of the solid. Ferric ammonium oxalate forms green/yellow solutions.
Dissolve
both chemicals in a small amount of water. Both chemicals dissolve in water
quite well. Potassium ferricyanide forms deep yellow solutions, despite the red
color of the solid. Ferric ammonium oxalate forms green/yellow solutions.
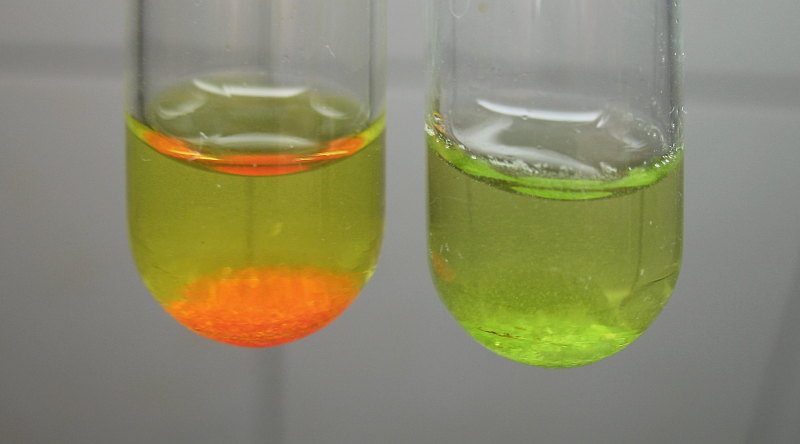
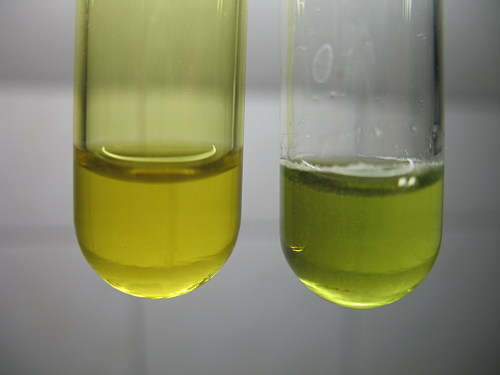
![]() When
both chemicals are dissolved completely, then they have to be mixed into a
single test tube. When they are mixed, then it is important to work in a dimly
lit room, otherwise the chemicals already react, while still in solution. The
pictures below show both chemicals, dissolved completely, and the mix of the
chemicals, which has a nice green color.
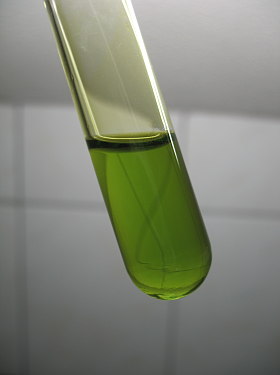
When
both chemicals are dissolved completely, then they have to be mixed into a
single test tube. When they are mixed, then it is important to work in a dimly
lit room, otherwise the chemicals already react, while still in solution. The
pictures below show both chemicals, dissolved completely, and the mix of the
chemicals, which has a nice green color.
![]()
Preparing of the photo-sensitive sheet
When the photo-sensitive mix of chemicals is made, then it must quickly be painted onto a piece of paper. The amount shown in the picture above, which is 3 ml or so, is sufficient for covering a single sheet of A4-paper.
With a little brush, or with a smooth glass rod, the liquid can be spread out on a sheet of paper as follows:
- put the A4-sheet on a smooth and clean glass plate
- pour the liquid from the test tube on the sheet of paper
- with a glass rod or a small brush spread the liquid over the paper, such that it is evenly spread
When the liquid is spread well, then the sheet of paper is uniformly yellow (the original sheet of paper was pure white, standard printer paper). The picture below shows the wet sheet of paper with the yellow liquid on it.
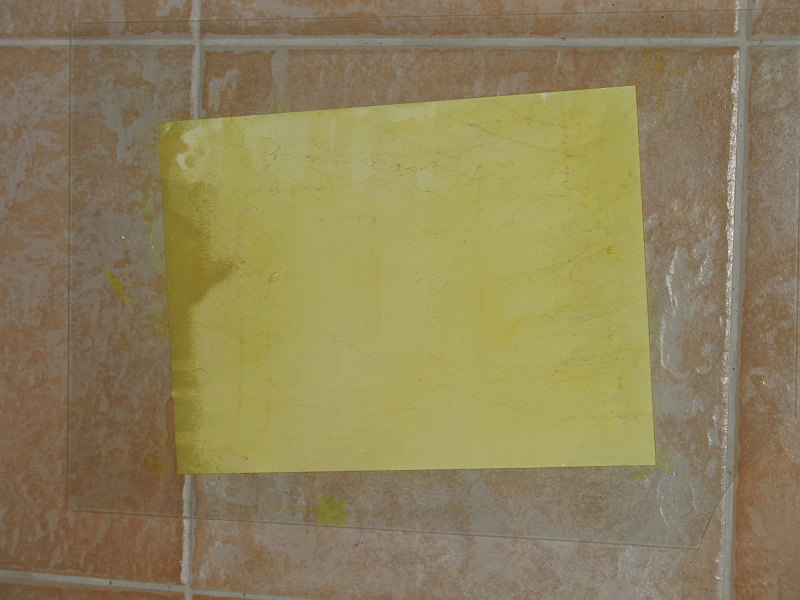
At the left edge, the sheet of paper unfortunately became too wet and it was swollen somewhat, but this did not affect the outcome of the experiment too much.
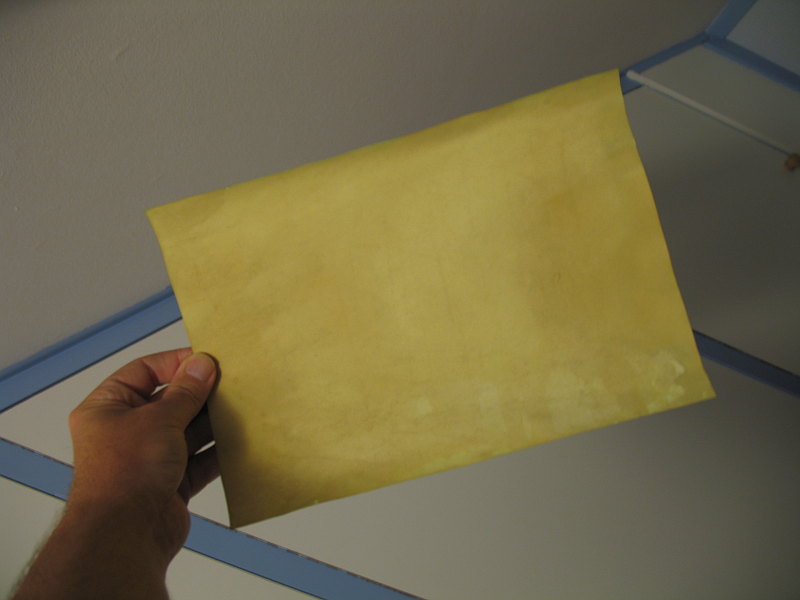
After spreading the liquid over the paper put the glass plate with the sheet of paper in a totally dark place at room temperature for several hours, until the paper is dry. After drying, the dark and soaked edges look much better again. The following picture shows the dried sheet of paper in a dimly lit room. It is fairly uniformly yellow.
![]()
Making a simple picture
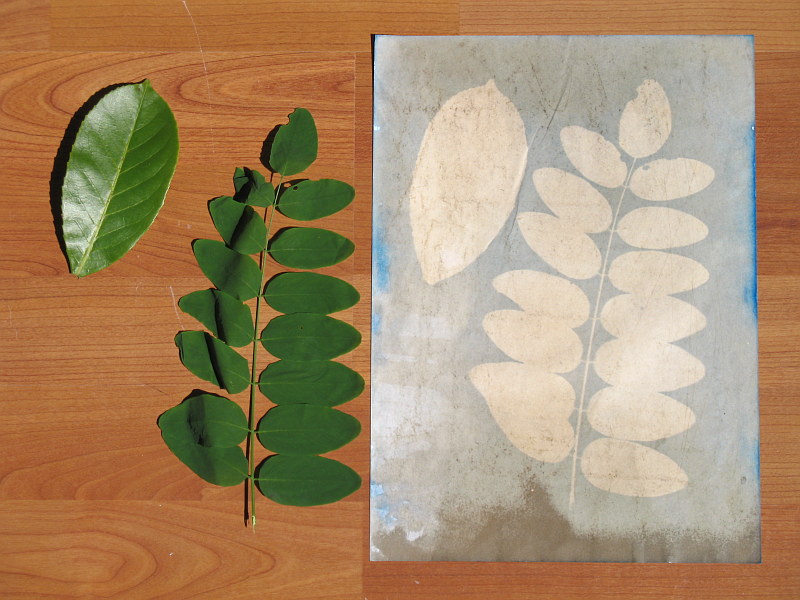
When the paper is dry, then it can be used to make a simple picture. Nice results can be obtained with negative film sheets, but with simple things like leaves one also can do the experiment.
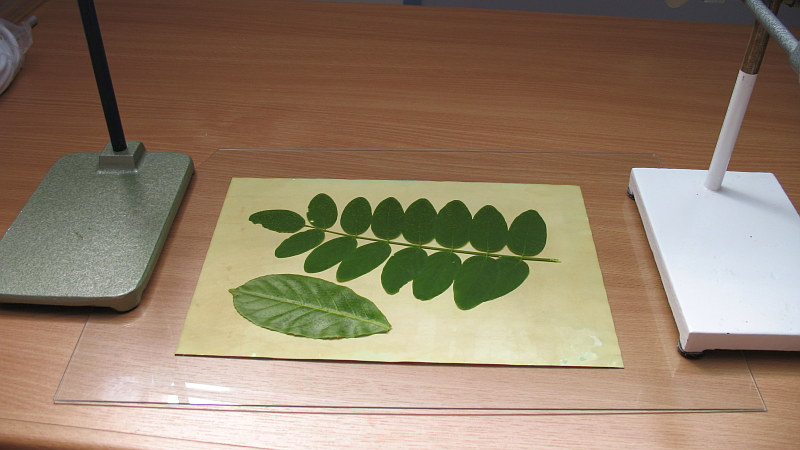
Put some thin objects on the piece of paper and cover the sheet and objects with the glass plate (which probably must be cleaned well when it was used for wetting the paper). Put the whole in a place with sufficient daylight. When direct sunlight is falling on the sheet, then an exposure time of 20 to 40 minutes is needed, with diffuse light, several hours of exposure are needed.
Immediately after putting the sheet of paper in the light, the sheet is yellow, as shown in the following picture.
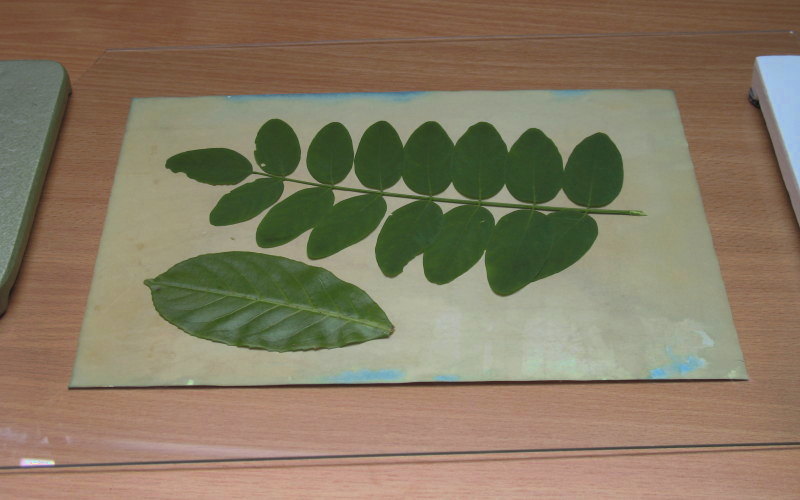
After an hour or so in diffuse light, the color of the sheet has shifted towards a more grey color. One should keep the sheet in diffuse light for at least three hours for a good result. The picture below shows the sheet after one hour of exposure.
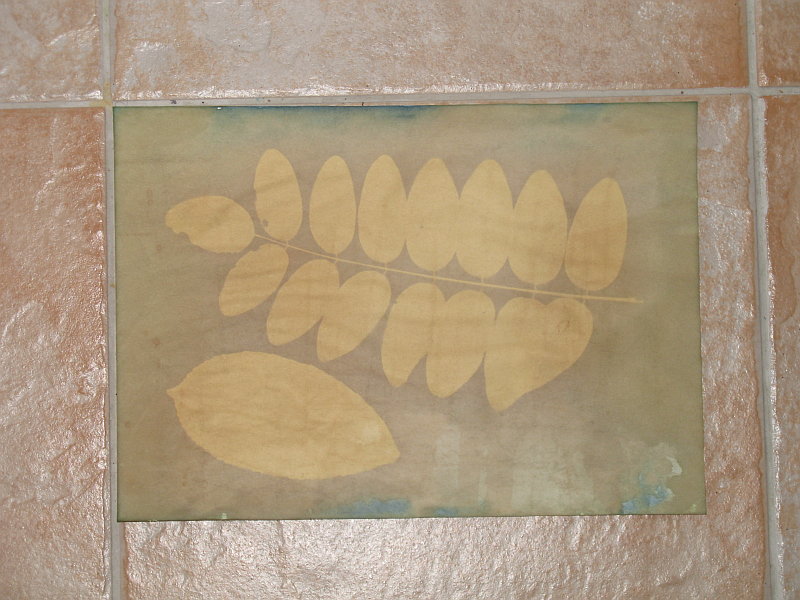
Finally, when the objects are removed, then one can clearly see the difference between exposed and non-exposed areas. The non-exposed areas still are yellow, the exposed areas also still are yellow, but with a blue/cyan stain. With really long exposure times, one can get deep blue results, but in such conditions, the non-exposed areas also may be stained, because the objects such as leaves also are somewhat transparent to light.
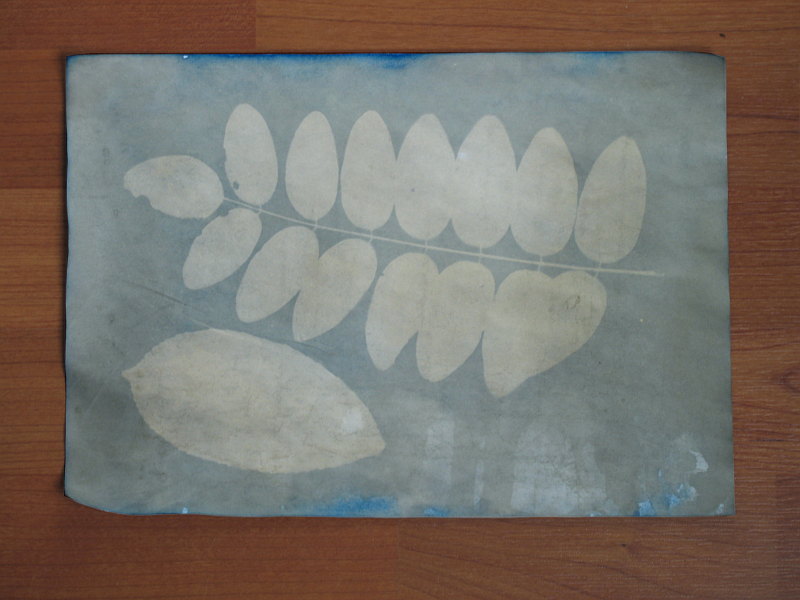
The yellow material is soluble in water, the blue stain is insoluble. So, fixing the image can be done by simply rinsing it very well in water. Adding a little acid to the first rinsing water makes the blue color a little bit more saturated. Multiple rinses are needed to get completely rid of the yellow soluble mix. The paper also must be soaked with water completely to completely rinse away the yellow chemicals. After three careful and slow rinses, with 20 ml of white household vinegar added to the first rinse, the result is as follows:
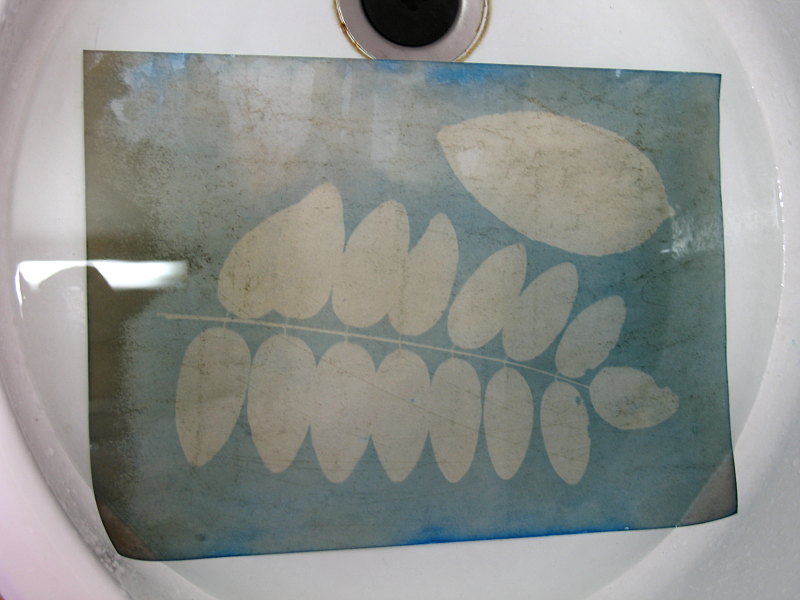
After the rinsing, the sheet of paper must be put on a flat surface and carefully dried with a towel by tapping it. Do not rub the paper as this will probably tear it in pieces. The still wet paper is shown, together with the leaves and one can nicely see how all features of the leaves are printed in negative on the sheet of paper.
The final result after drying looks better, the dark and soaked rims of the paper now also look better and the brown spots have gone.
The contrast of the result of this experiment is moderate. Stronger contrast can be achieved by means of longer exposure. When exposing the sheet of paper, just check its appearance. The darker the exposed parts and the more blue the exposed parts, the higher the contrast.
![]()
Discussion of results
![]() The principle behind this phenomenon is that iron(III) is
photo-sensitive in the sense that it can be activated by light of sufficiently
short wavelength, such that it very easily accepts an electron, to become
iron(II), much more so than in a normal situation. When a suitable reductor is
present, then the iron goes to oxidation state +2. This reaction even can occur
in the solid state, when the reductor is close enough to the iron atom. A
formalized reaction equation of this phenomenon can be written as:
The principle behind this phenomenon is that iron(III) is
photo-sensitive in the sense that it can be activated by light of sufficiently
short wavelength, such that it very easily accepts an electron, to become
iron(II), much more so than in a normal situation. When a suitable reductor is
present, then the iron goes to oxidation state +2. This reaction even can occur
in the solid state, when the reductor is close enough to the iron atom. A
formalized reaction equation of this phenomenon can be written as:
Fe3+ + hν → Fe3+,*
Here the symbol Fe3+,* stands for a highly reactive species, which is eager to pick up an electron. When the iron(III) is part of a complex with reducing ligands, then the transfer of an electron easily occurs.
In the chemical mix, used in this experiment, there is no free Fe3+ ion, but it is present in the trisoxalato ferrate(III) complex and in the hexacyano ferrate(III) complex. In the trisoxalato complex the oxalate ligand is a suitable reductor and it is tightly bound to the iron(III) core, so the activated species Fe3+,* indeed can pick up an electron.
So, an internal redox reaction occurs when ferric ammonium oxalate is treated with light of sufficiently short wave length. Oxalate is reduced to carbon dioxide and iron(III) is going to iron(II). If ferric ammonium oxalate is put in bright sunlight for a long time, then quite a large part of this chemical is converted to ferrous ammonium oxalate and carbon dioxide. For this reason, ferric ammonium oxalate must be stored in a dark container.
![]() The iron(II) species, which is formed in the redox reaction
as described above, in turn reacts with the ferricyanide complex to form the
intensely blue ferrous ferric cyanide, so called prussian blue. This reaction is
well known and can easily be demonstrated by adding a salt of iron(II) to a
solution of potassium ferricyanide. Especially when the environment is made
slightly acidic, the iron(II)/oxalate complex becomes sufficiently labile to
have free iron(II) which in turn can react with ferricyanide to give the blue
FeFe(CN)6–.
The iron(II) species, which is formed in the redox reaction
as described above, in turn reacts with the ferricyanide complex to form the
intensely blue ferrous ferric cyanide, so called prussian blue. This reaction is
well known and can easily be demonstrated by adding a salt of iron(II) to a
solution of potassium ferricyanide. Especially when the environment is made
slightly acidic, the iron(II)/oxalate complex becomes sufficiently labile to
have free iron(II) which in turn can react with ferricyanide to give the blue
FeFe(CN)6–.
Remark 1: This experiment also works with ferric ammonium citrate. In this chemical, the iron(III) is coordinated to citrato ligands and these also are suitable reductors.
Remark 2: Another variation which may be interesting is to use a metal ion, which is converted to the free metal, instead of ferricyanide which binds to the iron(II) atoms. When the ferricyanide salt is replaced by a palladium or gold salt, then the iron(II), formed in the photochemical redox reaction immediately reacts with the palladium ions or gold ions to give the free metal in a very finely divided form. In the past this kind of variations have been used as well.
In the experiment, described above, only a very simple photo-sensitive mix was used. This is nice for a chemistry demo, but for true cyanotype work, being an art based on science, much more advanced mixes are used. Usually a sensitizer is added in order to make the chemical more photo-sensitive, allowing shorter exposure times and giving stronger contrast. A wetting agent is added to make it more easy to uniformly spread the liquid over the paper. The rinsing bath also can contain additives to add more contrast and color to the final prints. A nice webpage about the cyanotype process is Mike Ware's site: http://www.mikeware.demon.co.uk/cyano.html.